Dual-write Integration Key’s Nitty-Gritty

Dual-write allows the real-time integration of data between D365 CRM and F&O environments.

Well! While integrating two systems it is must that both the system knows how to find the respective record in other system’s table. This is where the Integration key comes into the picture.

Integration Key tells Dual-write engine, what columns to be taken into consideration while finding the respective record in D365 CRM.

Let me explain this with an example,

Consider in F&O there is a Customer (it synchronizes to the Account table in D365 CRM) with the Customer Number as DEMF001 and this has already been synchronized to D365 CRM. Now, next time if any update is made to the DEMF001 record in F&O the updated details should synchronize back to the right record. How will Dual-write engine know which is the respective record in D365 CRM? It is with the help of Integration Key. For this scenario I would configure the integration key as below.

Integration Key

Note: Company is equivalent to F&O’s Legal Entities.

Alternate Keys

Alternate Keys

Let us understand, how this is related to Alternate Keys in D365 CRM. In the D365 CRM, the main purpose of Alternate Key is to facilitate an integration with another system that usually do not use GUIDs as the primary key and have a different Primary Key. Also, Alternate Key in CRM makes sure that the value for the column(s) which is/are part of the Alternate Key is unique or else it will throw an error. It is best practice to define the Alternate Key and it will automatically be translated to as the Integration Key in Dual-Write.

Note: If your table has multiple Alternate Keys make sure to manually check the Integration Key whether the right one is applied or not.

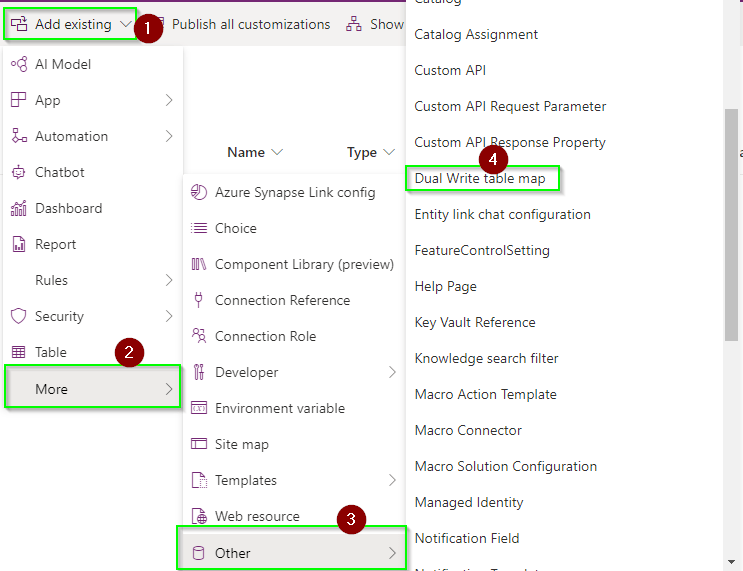
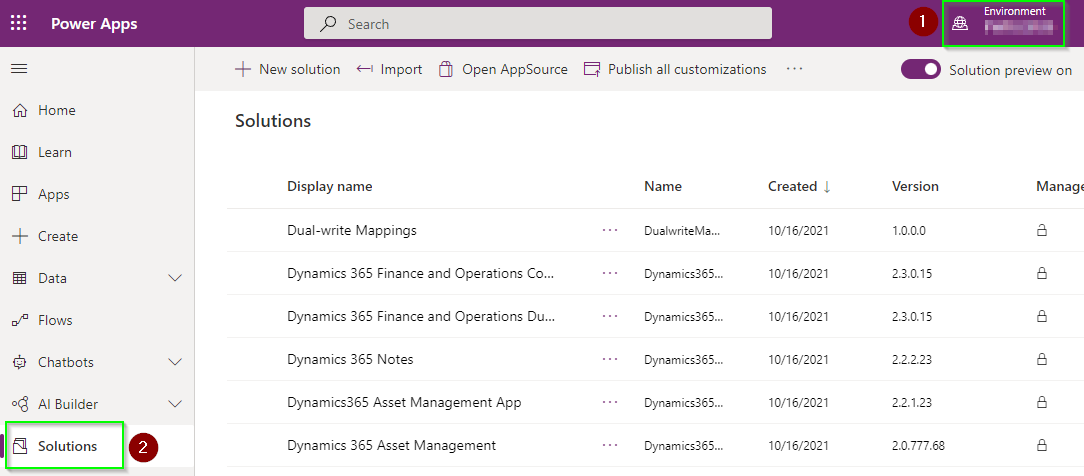
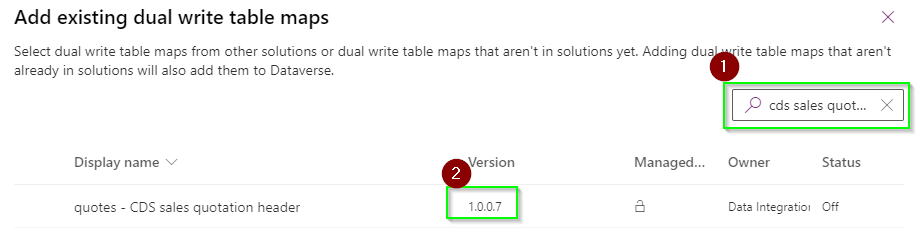
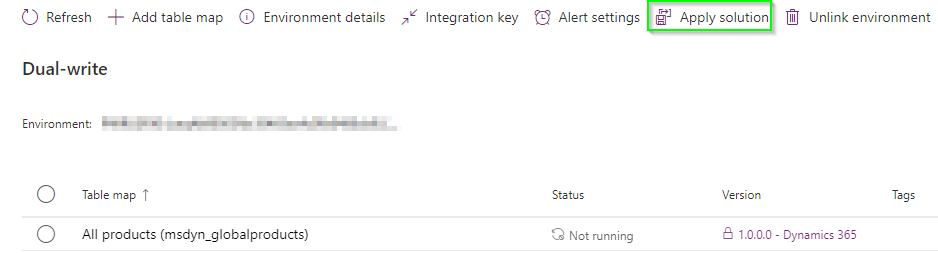
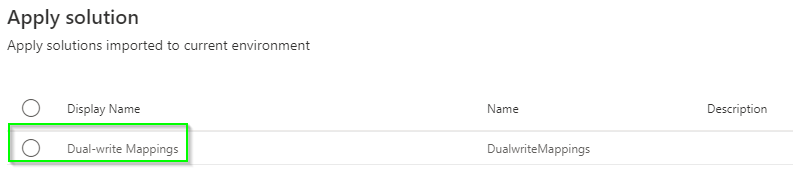
Migrate Integration Key from one environment to another

The question whether the Integration Key can be transferred from one environment to another is quite a valid question, so to answer it yes, it is possible. However, it is not a straightforward process. For the Integration Key to be available at the destination environment, along with moving over the Dual-write mappings, you need to make sure that the table that you are trying to move has the Alternate Key defined with the right columns. Alternate Keys will then be translated as the Integration Key.

Conclusion:

This way even the Integration Key would be automatically added.

Dual-write Mapping is Solution Aware

Yes, you heard it right, Dual-write mapping is solution aware meaning it can be exported from one environment and can be imported into another with the help of our beloved solutions.

The process of adding the Table mapping to a solution is straightforward.

In this blog, we will explore the process of adding the Table mapping to a solution as well as after importing the solution to the destination environment we will see how to use the latest version of the mapping.

Will be changing the CDS sales quotation header (quotes) table map (this comes along with the installation of Dual-write solutions) and save it with a different (higher) version and a publisher. (This blog will concentrate on moving the table mapping from one environment to another and after that on applying the latest version and will not cover the steps on how to change an existing table mapping)

Before Changes:

Before Changes

After Changes:

Steps on adding the Dual-write (Table) Mapping to a solution:

Step 1

Navigate to https://make.powerapps.com. From the top right-hand side corner choose the right Environment and go to the Solutions tab.

Select environment and the solution

Step 2

Open the solution in which you want to add the mapping (or create a new if you do not have one).

Click Add existing -> More -> Other -> Dual Write table map

Steps to reach Dual write table map while adding in the solution

Step 3

From the Add existing dual write table maps screen, search for the table mapping name and then select the right mapping and click Add.

Add existing dual write table maps screen to add the table map
Note: If you are adding the table mapping in an existing solution and the table mapping in question already exists with an older version then kindly remove the older mapping from the solution first and then add the new one.

Step 4

Next step is to export the solution (preferably managed if moving to a Production environment) and import it in the target environment.

Once the solution is imported, it is time to look at how to use the latest table mapping.

Steps for enabling the latest table mapping:

Step 1

In the Dual-write module click on Apply Solution.

Apply solution button

Step 2

In the Apply Solution screen select your solution and click on Apply.

Table mapping Apply solution screen

Step 3

Search for the Table Map then select the Table map from the list and click on Table map version.

Table map version button

Step 4

Select the right Table map and click Save. Voila!!!

Table map version

Conclusion:

It is easy to move the table map from one environment to another.

In the next blogpost, I have discussed in detail about the Dual-write Integration Key.

Did you know Power Automate Flow supports C# code?

Power Automate flow is consistently evolving. At times there are UI changes or at times there are under the hood tweaks, but one thing is for sure Power Automate flow has matured a lot since its inception.

Today, in this blogpost, I will be discussing about the new feature that has been introduced recently in Power Automate.

Currently, we have plethora of connectors to choose from when it comes to getting our work done. However, there is also a way to create Custom Connector to bridge the gap with missing functionalities. The enhancement in question i.e., the usage of C# code has been made a part of the Custom Connector. Let me walk you through the process of creating a custom connector and the way to add the C# code. I will add the support of Math.Round, Math.Ceiling and Math.Floor using C#. With the introduction of C# support, we can do a lot many things.

Steps to create Custom Connector with C# code:

  • I will be adding this in the solution, so I will begin by creating a custom connector in the solution. The other way of creating a custom connector is by going to Data -> Custom Connector.
  • At the time of writing this blog, this feature is in Preview, meaning it is not recommended to be used in production.
Step 1:

In the solution where you want to add the Custom Connector, click on New -> Scroll to the bottom and click Other -> Select Custom Connector.

Add Custom Connector to the Solution.
Step 2:

Give a name to your Connector Math, provide a Description and a Host.

Host does not matter in the case of Custom Connector with C# code

Custom Connector General Tab
Step 3:

Let the Authentication Type be No Authentication.

Step 4:

On the Definition tab, Click on New action on the left-hand side. Create one with the below details.

Custom Connector Action General

For Ceiling and Floor Actions (while adding it later in the stage) replace Operation ID with MATH_CEILING and MATH_FLOOR respectively. Also, modify Summary and Description accordingly.

Store MATH_ROUND, MATH_CEILING and MATH_FLOOR for future use.

Step 5:

Add Request for the action, click on Import from sample.

Custom Connector Request

On the Import from sample screen, add the below details and click Import

Custom Connector Request Import

For feasibility, below is the JSON you can copy paste.

{
 "Number": 1.5
}

For the Ceiling & Floor Actions (while adding it later in the stage), replace URL with /math-ceiling and /math-floor respectively. Other details remain same.

Step 6:

Time to tweak the body a bit. Click on the 3 dots next to body.

Custom Connector Request Body

Now, click on 3 dots next to Number.

Custom Connector Request Parameter

Fill in the details as below,

Custom Connector Parameter Details
Step 7:

Time to define the Response. Click on Add default response.

Custom Connector Response

Add the values as below and click Import.

Custom Connector Response Details
{
  "value": 1.5
}
Step 8:

Edit Response by clicking on the three dots on value.

Custom Connector Response Value

Add the information as below,

Custom Connector Response Value Details
Step 9:

Click Create Connector and from time to time keep clicking on Update Connector for the changes to be saved.

Step 10:

Repeat Steps from 4 to 9 for Ceiling and Floor operations. 

Step 11:

Enable the Code and Select all the 3 Actions created before.

Custom Connector Code
Step 12:

Copy and paste the below code in the editor.

public class Script : ScriptBase
{
	public override async Task<HttpResponseMessage> ExecuteAsync()
	{
		return await this.HandleMathOperation().ConfigureAwait(false);
	}

	private async Task<HttpResponseMessage> HandleMathOperation()
	{
		HttpResponseMessage response;
		
		// Get the Operation Id
        string operationId = (string)this.Context.OperationId;
		
		var contentAsString = await this.Context.Request.Content.ReadAsStringAsync().ConfigureAwait(false);

		// Parse as JSON object
		var contentAsJson = JObject.Parse(contentAsString);

		// Get the Number
		double number = (double)contentAsJson["Number"];
        
		// Based on the Operation Id perform the right action
        if(operationId == "MATH_ROUND")
			number = Math.Round(number);
        else if(operationId == "MATH_CEILING")
            number = Math.Ceiling(number);
		else if(operationId == "MATH_FLOOR")
			number = Math.Floor(number);      

		JObject output = new JObject
		{
			["value"] = (float)number,
		};

		response = new HttpResponseMessage(HttpStatusCode.OK);
		response.Content = CreateJsonContent(output.ToString());
		return response;
	}
}
Step 13:

Update the connector and on the next step test the newly created connector.

Few things to note:
  1. Code takes precedence over codeless definition
  2. Only one C# script can be added per Custom Connector
  3. Code must be in C#
  4. Max execution time cannot execute 5 seconds
  5. File size cannot be more than 1 MB
  6. C# code needs to be tested locally

I feel even with the limitations stated above the opportunities that it opens is infinite.

Screenshot of the Power Automate Cloud Flow:

Power Automate Cloud Flow
%d bloggers like this: